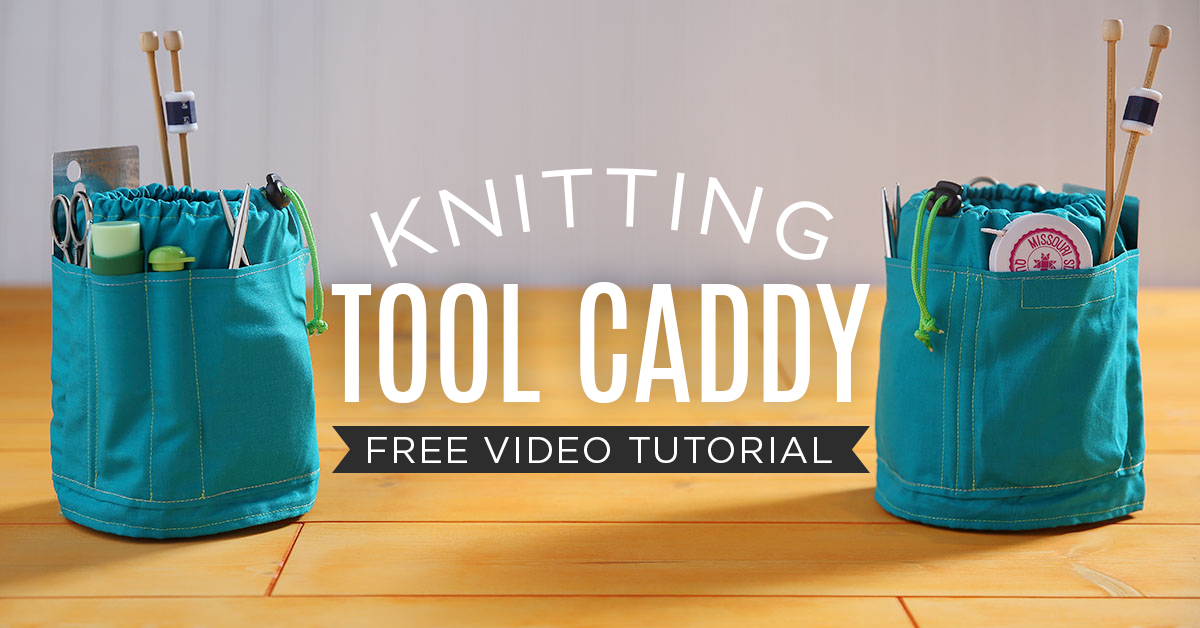
The urge to create can strike at any moment. Make sure you have your supplies at the ready!
I travel a ton, and it’s hard to leave my sewing studio behind. My mind is always running a mile a minute with new project ideas, and it drives me crazy to not be able to get my hands on some interesting supplies.
This week we’ll show you how to create a travel caddy for your knitting tools or any other project supplies you like to keep close at hand. This caddy is totally customizable to fit your needs, so you’ll be able to take your latest project with you wherever you go. Click on the button below to learn how to make it!
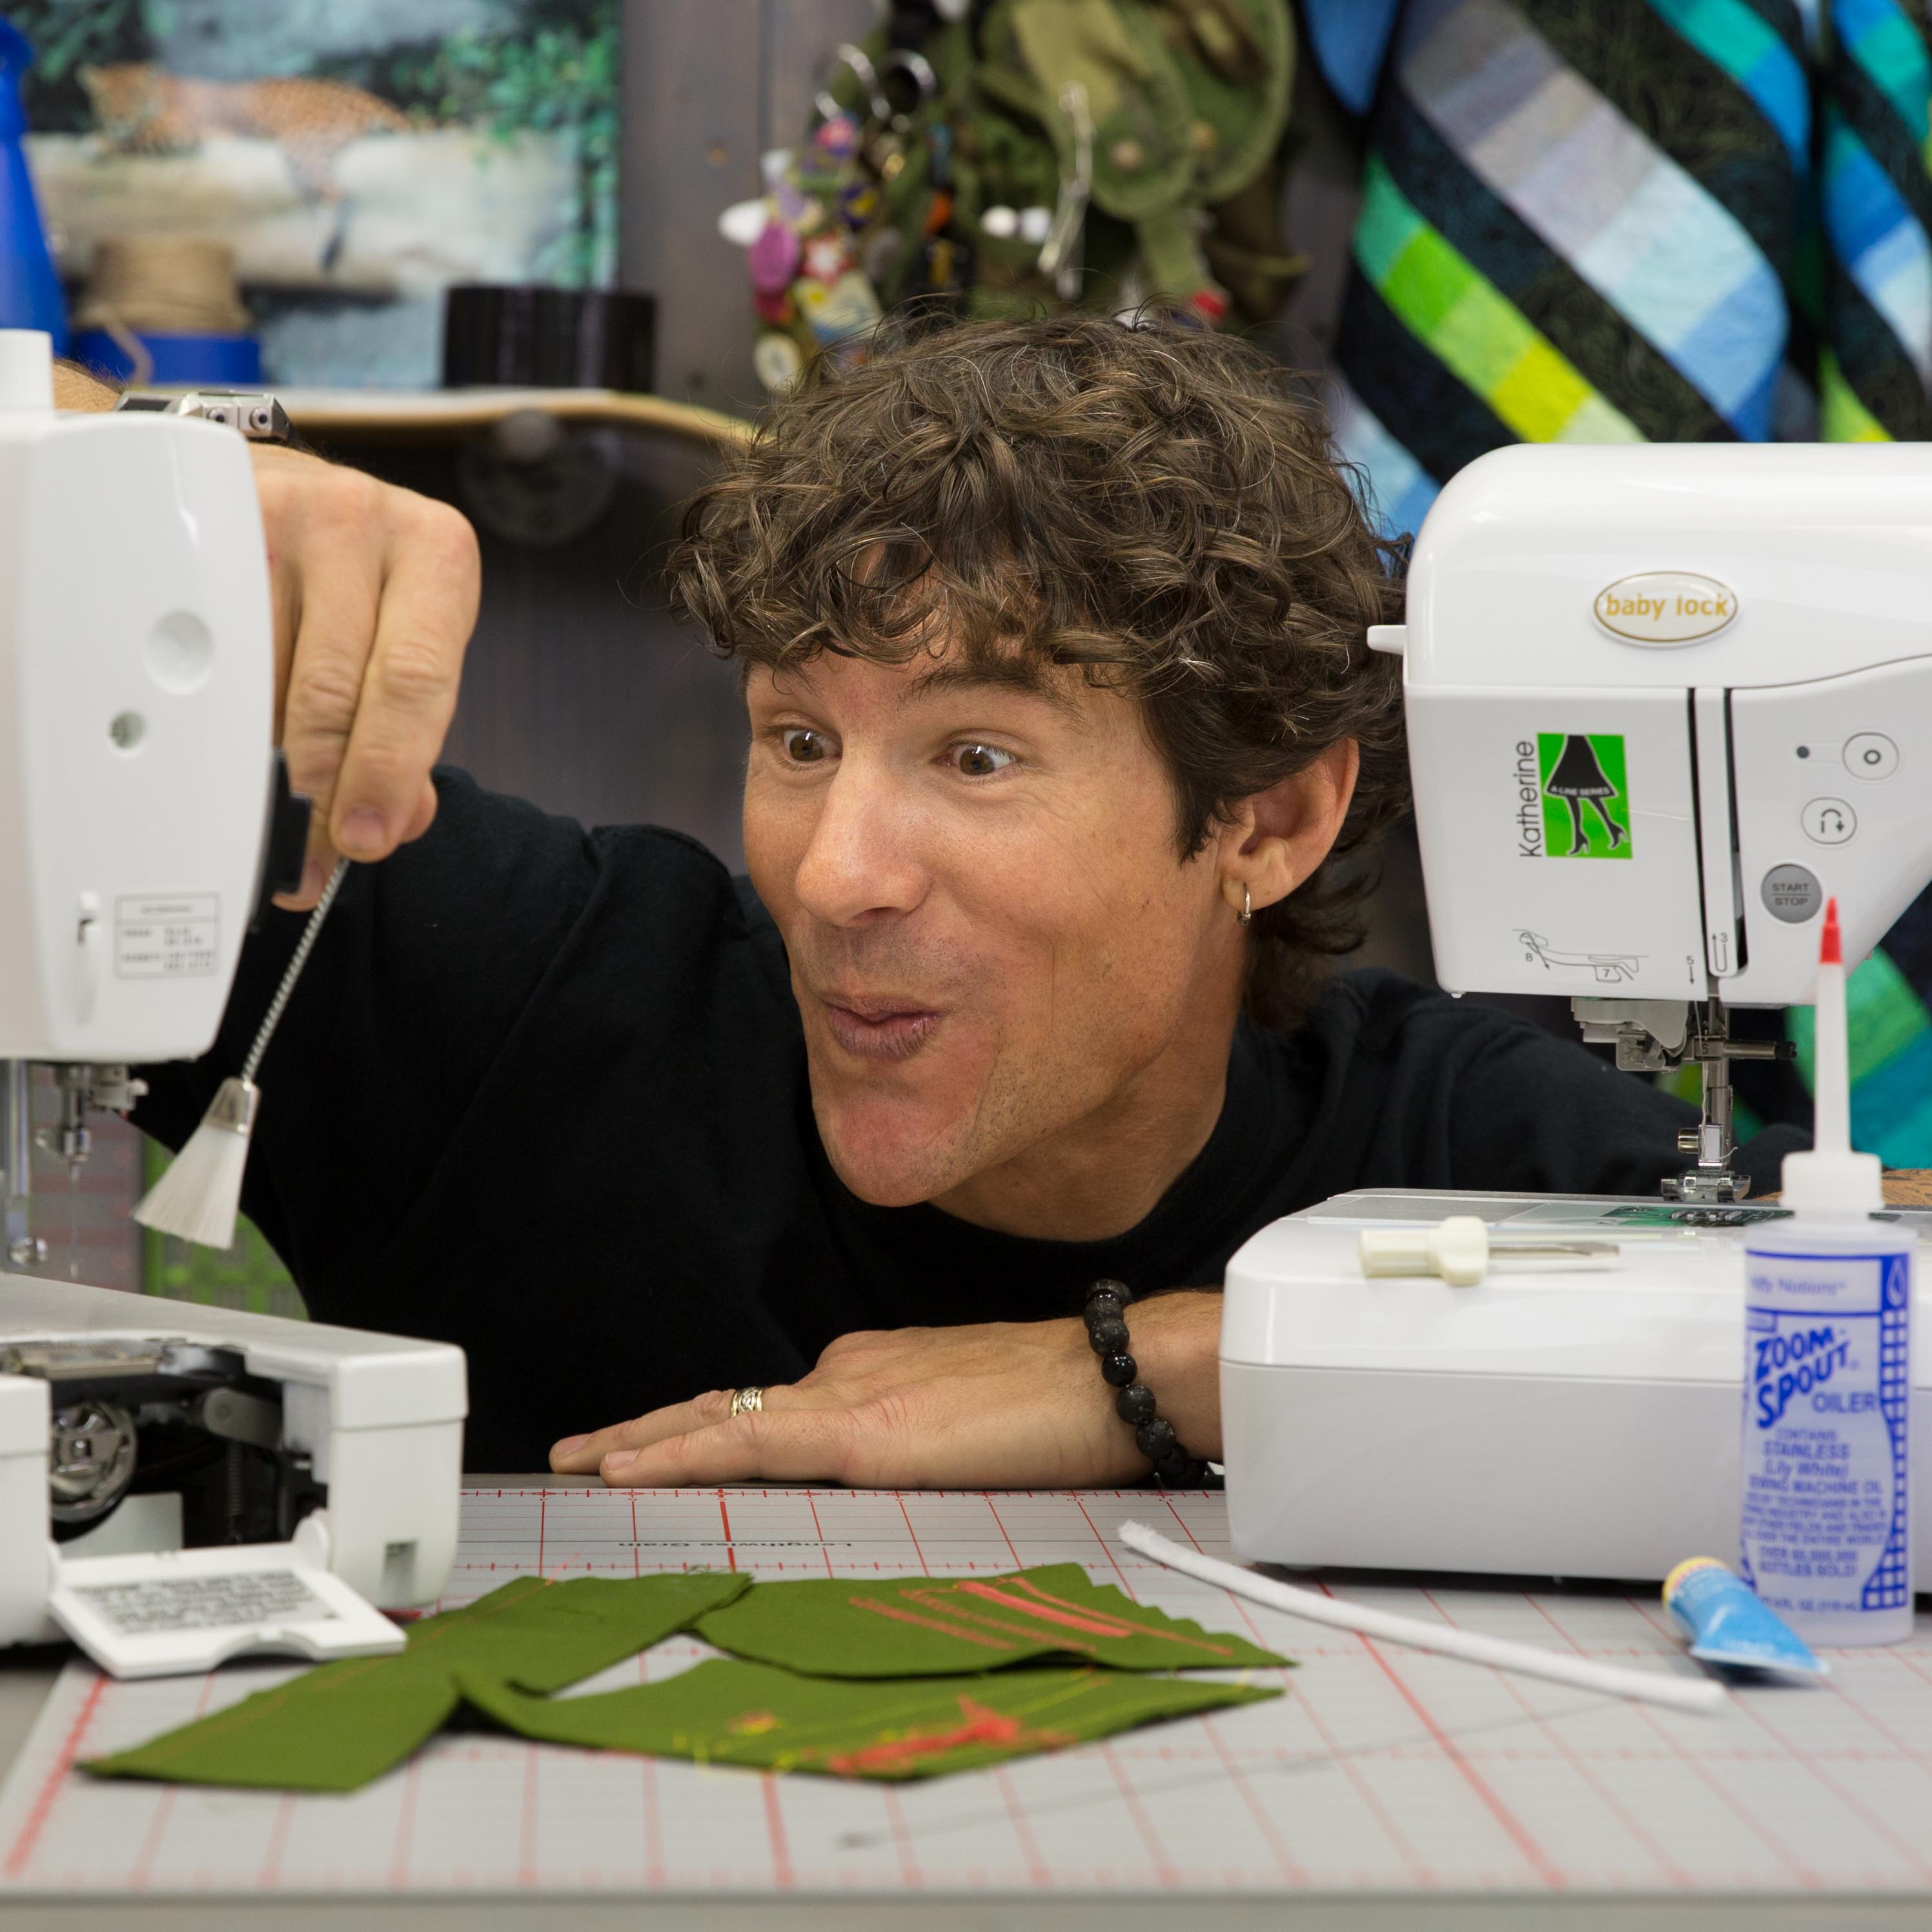
Messy stitches. Loose threads. Clanking metal. Lint clogs. When you’re in the quilting groove, there’s nothing more frustrating than an out-of-whack sewing machine. Luckily, there are a few tips and techniques that can get your machine up and running in no time, and Rob is just the guy to show you how! In fact, he gets pretty excited about taking care of his machines!
This week Rob has released a series of three video tutorials to guide you through do-it-yourself repair and maintenance. He’ll also help you diagnose problems that require professional attention. With over 15 years of experience as a sewing machine technician, you can count on Rob to give you the inside scoop!
Click on the image below to see all three Machine Maintenance tutorials!
Friendly suggestion: Make sure you’re subscribed to the Man Sewing YouTube Channel, so you can come back to these over and over again!
Yesterday we had a great time going over the perfect french press mug and how to clean a Featherweight sewing machine! We even show you how we make our coffee on the go! That’s right! Enjoy this fun periscope!
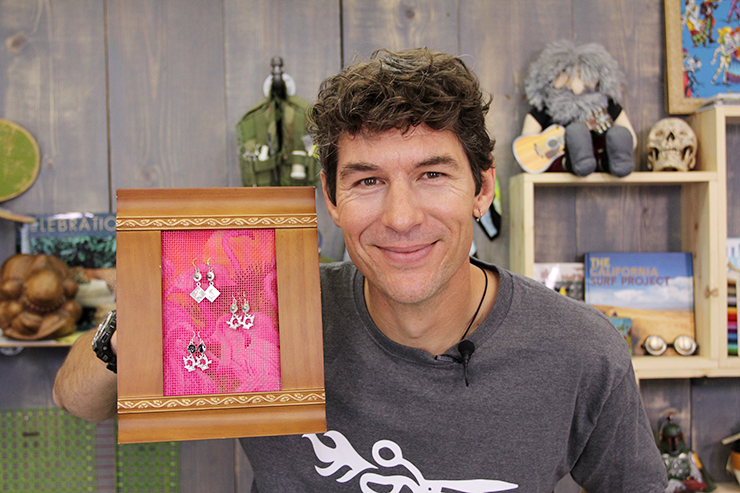
Happy Manly Monday everyone!! This week’s tutorial is a fun one! A few months ago I showed you how to make a beach bag using pet screen and today’s tutorial uses the leftover pet screen from that project to make an Earring Holder!
I’m the type of person to get a head start on Christmas gifts! So anytime I find an easy project that I can make for several people, I’m all for it! This is certainly one of those projects! Enjoy!
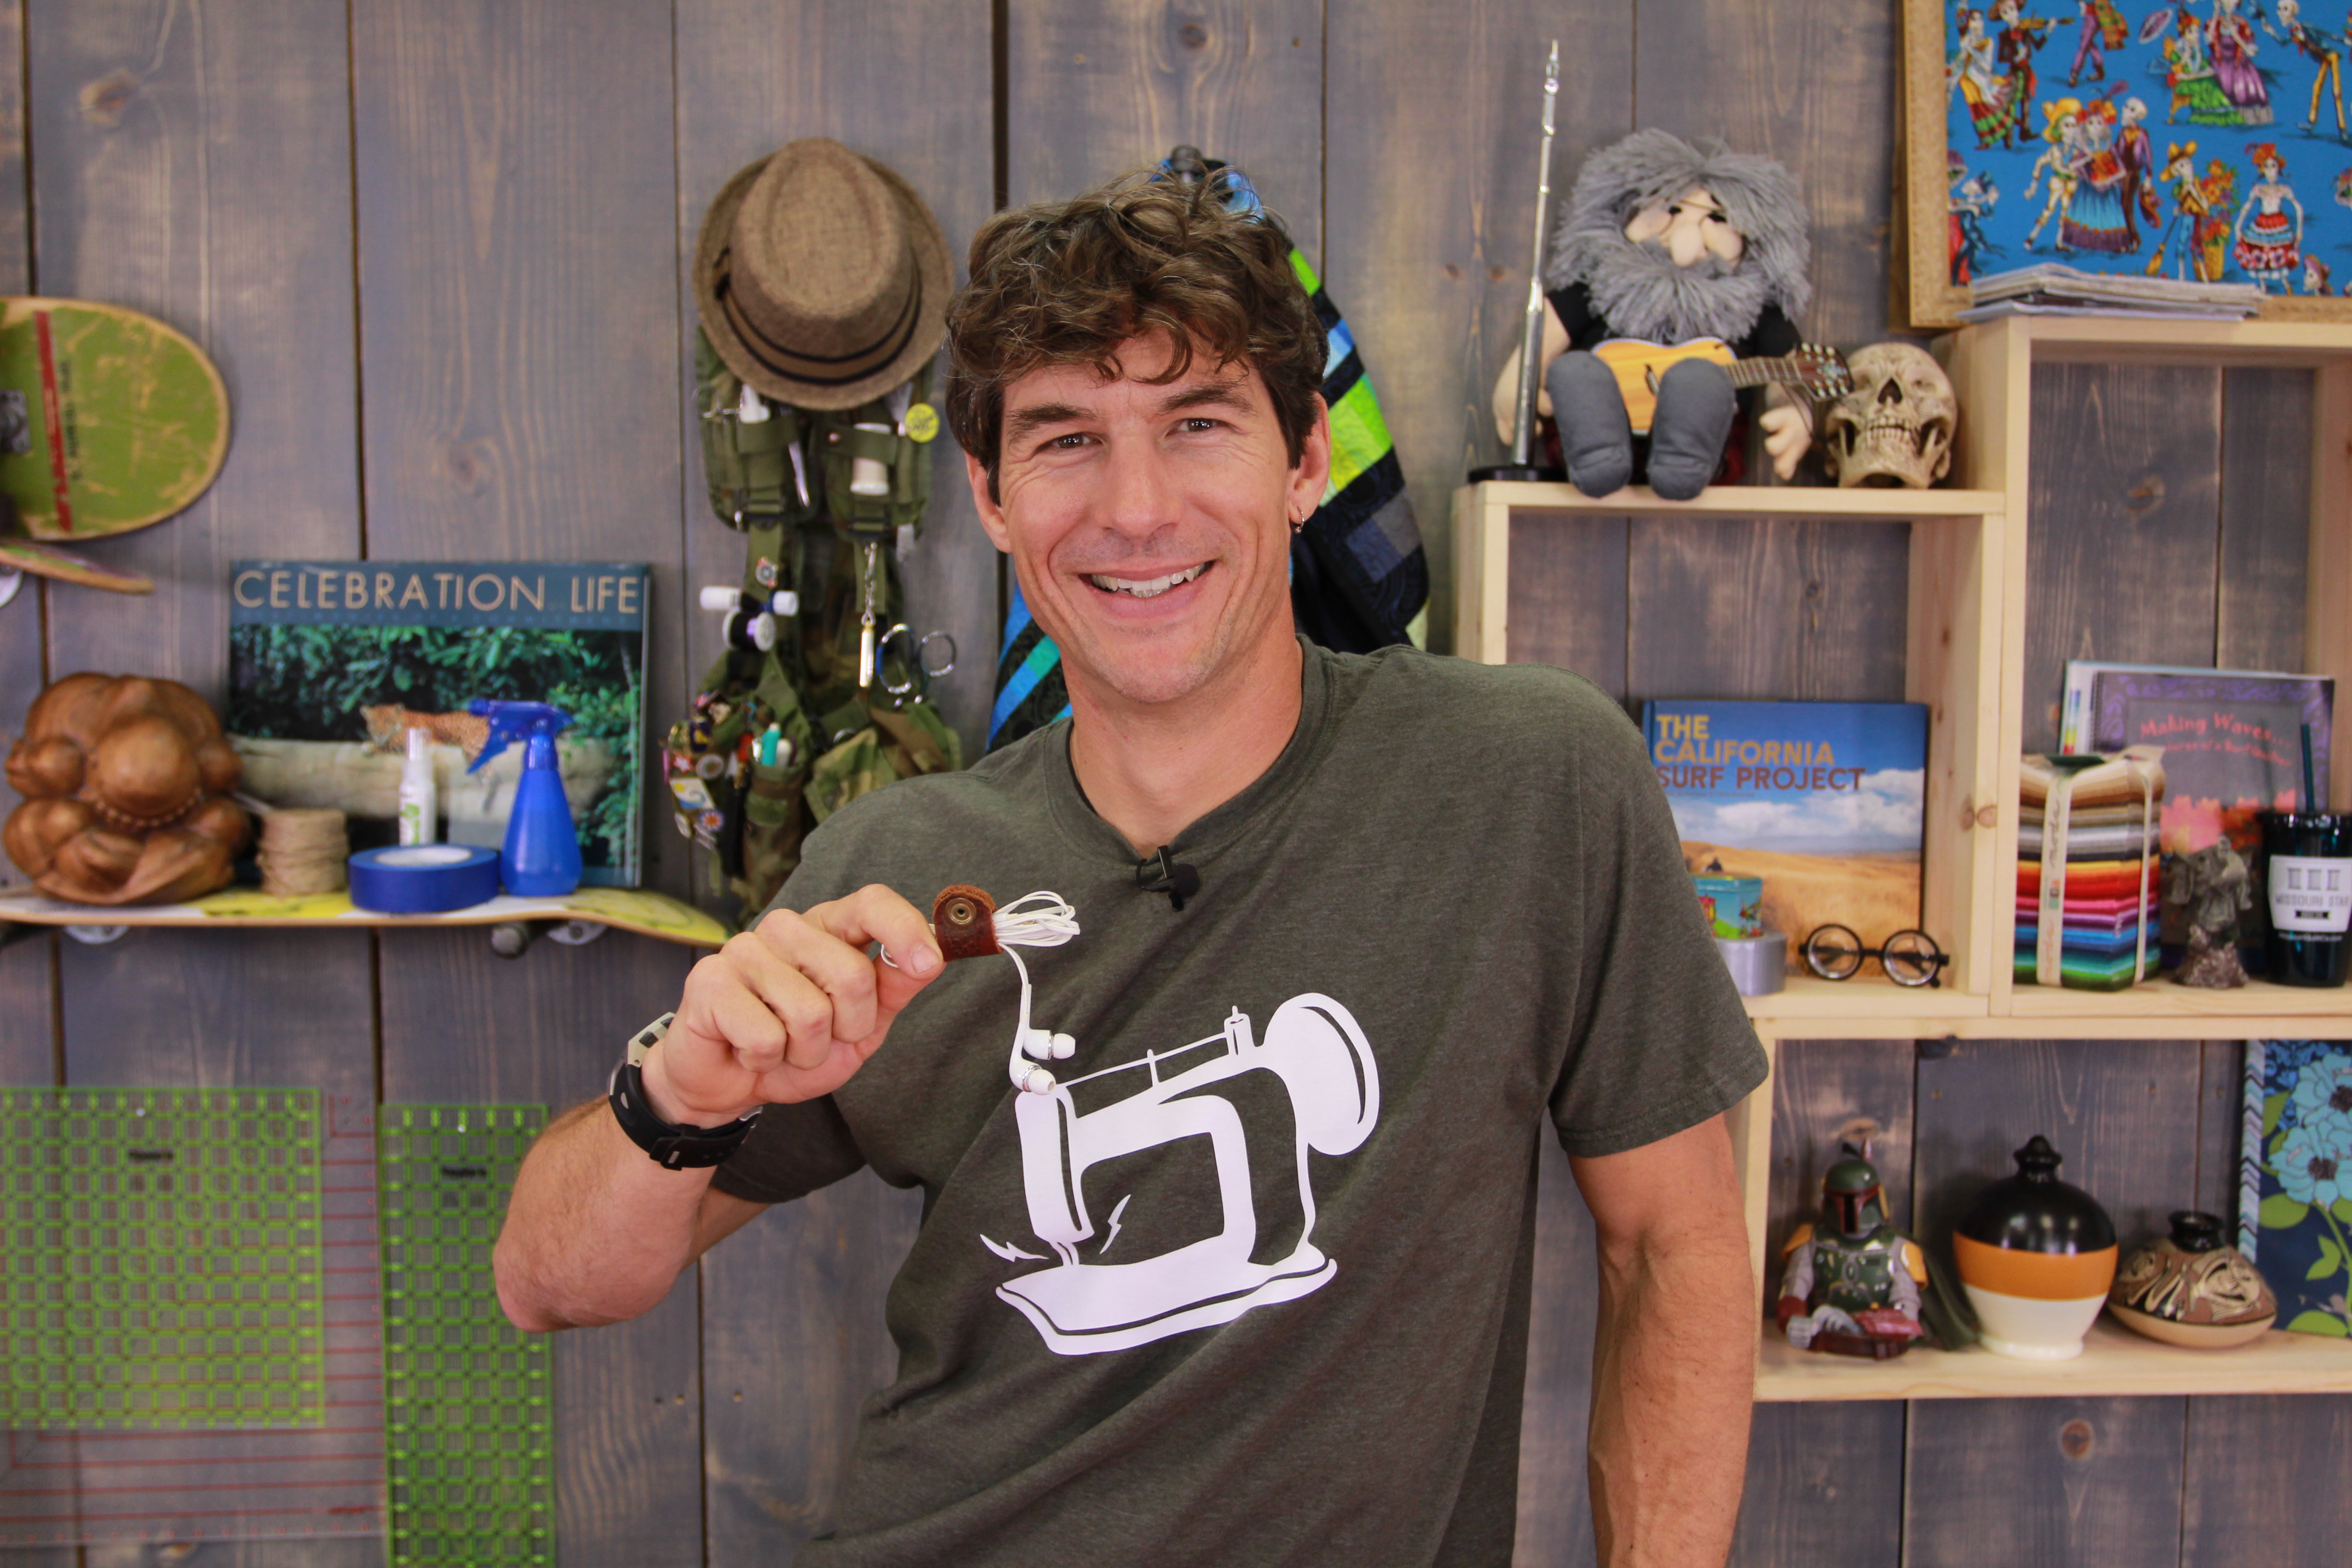
We all need ways to tidy up our earbud cords, phone chargers etc, so here’s a great tutorial (sewing optional) that you can easily carry in your pocket! This is also a great stocking stuffer or gift for any occasion!
Hey, everybody! It’s Rob from Man Sewing and I’ve got a tutorial around here somewhere, oh! There it is! Here’s today’s tutorial. That’s right, I’m going to show you how to make these awesome earbud cord keepers. So, I love having my earbuds with me always in my pocket, but they used to be this nasty, tangled mess and the phone would be ringing and I would be trying to get them plugged in and listen. Or, maybe I’m listening to music and I’ve got a knot in the cord or something.
So, I was shopping in a Target years ago, and they have all those little things along the counter that you play with while you’re waiting in line, and there was this piece of plastic that was called a cord keeper and I thought, “what on earth is this?” And, so, I didn’t get it. And all of the sudden I got home and thought, “man, I sure wish I had something to wrap my little earbuds around to make them comfortable and keep them in my pocket.” And I don’t like stuff in my pocket, really, so I didn’t want them all over the place.
So, watch how this works. This is awesome. It’s just a piece of leather. You can use fabric or ribbon or whatever and it just has a set of snaps in it. So, that’s the main working part right there, ok? And I’ve been using this for about six or eight months. So, this has got some real longevity and use out of it. And then my cord just unwinds, just like that, super easy, ok. Let me put this away, real quick, just by wrapping it around my hands. Ok? And I kind of give it a little pinch, like, yay. I made that look terribly difficult, didn’t I? And snap it closed and it’s ready to go back in my pocket. Alright? So the supplies you’re going to need for something, like, really, is just a set of snaps, and you could probably also use velcro if you are using lightweight fabrics, but I want to show you how to do the snaps. That’s actually mostly what you’re getting out of the tutorial, right, is how to install the snaps. So, a set of snaps actually has four pieces that all work together. So, you’re going to need one of those. You’ll need the snap setting tools and these generally come in the package. So if you’re buying snaps, make sure you don’t buy a replacement package if you don’t already have the working tools you need, ok? We’re going to need a pair of scissors to cut a hole in our fabric, we’re going to need a Sharpie marker to mark where that hole’s going to be, and then my favorite of all my tools today, yes, the 12 pound sledge hammer. No! We’re just going to use a nice, lightweight hammer, but we’re going to give this thing a couple good smacks when we’re done. So, you ready to get started and learn how this works?
While you’re watching this, I want you to be thinking about the different kinds of ways you can do this. I’m going to show you real quick with leather. This is a lightweight suede we have here, a little flexible. That kind of makes it nice for gripping around. It’s nice and pliable. And, again, I don’t like a lot of weight in my pocket, so this one was a three inch by one inch strip that I just made and snapped together. The raw goods kind of just look like that, right? Easy. Another one I was making this morning, just for fun, was one that I picked up in Nantag. Actually my wife and I were working at an event together, so we have nametags. So, don’t tell her that I am making her a very nice Christmas present right now, ok?
So, this is going to snap together the same, right? You could also do fabric. If I was doing two pieces of fabric, I would put some interfacing inside just to give it a little bit of body and that would be a good time to stitch through velcro also, ok? So, oh! I know there’s something else I’ve got to tell you because I was talking with Jake, the camera guy, a little while ago about this. Don’t try to sew through sticky backed velcro. This would be a perfect place for sticky backed velcro, but I don’t want you to needle through the sticky back. It just does terrible things to the needle and thread. So, if you’re thinking, oh, this is the perfect place for those sticky dots for velcro, no, no. I want you to stitch your velcro on if you’re using that. Ok, enough words, let’s get started on this. And, like I said, let’s finish out my wife’s Christmas present here before Santa shows back up. And, for this, the first thing I really want to do is just figure out where I’m going to put the snap. I need to cut a very small hole. And so, for this, I could try to put a little bit of pressure here and see if it will mark the back of my fabric. It’s done a little bit. If I couldn’t see it, the other thing I could try to do is, I could try to put my snap through here, right? Take my Sharpie marker and feel where that post is going to come through the fabric, right? What I don’t want to have happen, is, I don’t want my snap to fall off of the edge; I want it to be nicely centered in there. Ok, so I want that to finish in, like that. Nice and easy. So, once you’ve figured out where you’re going to put your snap, you’re going to fold it over. And what I’m going to try to do is use the back end of my scissor and make just the littlest cut possible to bring that post through, just like that, ok? Now, your snap setting tools have two sides. There’s kind of what looks like a record, like an old LP, right? That’s a black version of a CD, if you’re watching and you’re not 40 years old like some of us. And then the other side’s got a bowl or a dish. So, the pretty side of the snap is going to go into the dish and then this pounding tool has got a little dimple on the front or a little skinnier part on the front that’s going to fit right into the skinny part there, but first I need to put on the part of the snap that is going to get caught in here. I don’t actually think it matters which side you use for which, but I’m going to switch this around because I like to have the female side underneath that pretty side there. Now, I have a chunk of lumber underneath my table that’s just part of my working table here in my studio, and so I’ve moved this down here so I can give this a pound. Oh, this would be a fantastic time to turn the speakers down on your computer. I’ll give you a second. Ok, you ready?
Now, I’m going to give this a couple of good smacks. Come in! Just like that. Nice and secure. What do you think, ok? Now, let’s go ahead and do the same thing for the other side. I’m going to visually line that up, give it a little bit of a mark, just like I’ve got there. Slide that out of my way. Now, I always start by putting the pretty side on first so that I know where it’s going to be and where I’m going to line everything up and that I know that I have the orientation of the snap correct. From this part on, I’m going to drop in now what is considered the male part of the snap and I’m going to make sure that it’s going to work.
So, I’m kind of giving it a dry fit or a dry test to make sure that I have both parts on the right side of the fabric or the correct side of the fabric. I’m going to take and flip that over to the record player looking side of the record side of that and then the back of that snap, oh! Did I forget, did I forget to tell you to turn your speakers back up? If you missed that, you can rewind it now. Time to turn your speakers down. Ready? Turn your speakers back up! Ok, now we’re ready. Now, fantastic. We have that, just like, yay. It’s going to snap together and I think what I’ll do is tie this with a nice little red ribbon and put it in silky, like one of those satin little boxes, something about yay big. She’s going to probably think it’s a ring or some other piece of beautiful jewelry. Won’t she be surprised at Christmas? That’ll be so much fun! So that’s my real, fun, little example of how to keep your earbuds under control and in your pocket and I’m going to go put these in my smart phone and listen to some great music while you’re making yours and we’ll see you next time here at Man Sewing.
We decided to do a little something special for Cinco de Mayo, so we met up with Chad Rigby, Executive Chef of Blue Sage Restaurant in Hamilton, Missouri, to learn how to make some seriously delicious salsa! This is a quick and easy homemade salsa using fresh ingredients and basic spices.
Here are the ingredients for these delicious salsa recipes:
Traditional Salsa
16 oz. Diced Tomatoes
1/2 C. Finely Diced Yellow Onion
1 Jalapeno (seeded)
1 Tsp Granulated Garlic
1 Tsp Kosher Salt
1 Tbsp Fresh Minced Garlic
1/4 Tsp Red Pepper Flakes
1 Tsp Cumin Powder
1 Tbsp Coarsely Chopped Fresh Cilantro
Juice of 1 Lime
Fruit Salsa
1 C. Chopped Mango
1/4 C Kiwi (Peeled)
1/2 Anaheim Pepper (Seeded)
1/2 C. Yellow Onion
1 Tsp Kosher Salt
1 Tbsp Coarsely Chopped Fresh Cilantro
Juice of 1 Lime
Do you want to know more about this amazing restaurant, Blue Sage?? They are just down the block from Missouri Star Quilt Company! Check out their Facebook page here: https://www.facebook.com/bluesagedining