Make a Basic Bow Tie with Rob

Basic Bow Tie

Men’s formal wear can be a bit of a snooze-fest, but it hasn’t always been that way.

During the 1700s, fashion-forward dudes wore vivid colors, lots of embroidery, elaborate hair pieces, and even high heels. That’s a far cry from the basic black of the modern tailored suit.

Basic Bow Tie

Now, I’m not lining up for lacy cuffs or powdered wigs any time soon, but I do like to add a little personality to my outfit with a custom bow tie. Click HERE to learn how it’ done!

Monstera Deliciosa Leaf Applique Tutorial

Monstera Deliciosa Quilt

The monstera deliciosa is known by dozens of different names: Swiss cheese plant, fruit salad tree, Mexican breadfruit, Penglai banana. But no matter which name you use, this vine is totally massive! It can grow to be almost 70 feet tall. (That’s like Jack & the Beanstalk status, folks.)

Monstera Deliciosa Quilt

An average monstera leaf measures 30 inches by 36 inches, which is a fantastic size for a wall hanging. Click HERE to learn how to applique an awesome botanical quilt of epic proportions!

Strip Trees Quilt

Strip Trees Quilt

Strip Trees Quilt

One slice of a tree trunk tells the story of a lifetime. Droughts, forest fires, peaceful growing conditions – it’s all written in the growth rings, and if you know what you’re looking for, you can read it like a history book.

Strip Trees Quilt

I guess I’m a bit like a tree, but my life story is written out through the quilts I design. This week I put together a patchwork tree quilt. It was inspired by my own experiences in the woods, and I know you’re gonna love it. Click HERE to learn how to make it!

Check out a new tutorial every Monday!

Wonky Fireworks Quilt

Wonky Fireworks Quilt

wonky fireworks

When you’re spread out on your favorite quilt to enjoy a firework show, the last thing on your mind is science. But the truth is, every flash, boom, and burst of color is 100% dependent on chemistry.

Lithium creates bright red sparks, chlorine mixed with copper makes turquoise, and Titanium powder produces that deafening blast we love so much.

Wonky Fireworks Quilt

This week I’m mixing up my own recipe for fireworks using a few “In the Navy” charm packs. Click HERE to learn how to make this fun, patriotic quilt!

Check out a new tutorial every Monday!

FMQ Mariners Compass Quilt

FMQ Mariner's Compass

A quilt top, no matter how intricate, doesn’t have a ton of texture. It’s just…flat. That’s where FMQ comes into play. Because with a little planning, your stitch patterns can force the batting to puff – or crush – exactly where you want it.

FMQ Mariner's Compass

Last week I pieced together a Mariner’s Compass, and this week I’m finishing it off with an action-packed session of free motion quilting. Click HERE to learn how to give your compass quilt tons of 3-dimensional character with a few basic FMQ motifs.

Check out a new tutorial every Monday!

Mariner’s Compass Quilt!

Mariner's Compass Quilt

Mariner's Compass Quilt

Ahoy there! Don’t be afraid! Rob’s Mariner’s Compass Quilt may look like a doozy, but he’s got a secret weapon: The Quiltsmart paper piecing pattern with printed interfacing.

Mariner's Compass Quilt

This genius product will guide you every step of the way with sea-worthy accuracy – just like a real compass! Click here to watch Rob put together this gorgeous quilt!

Check out a new tutorial every Monday!

Science Jars Quilt

Science Jars Quilt

Science Jars Quilt

My quilting laboratory is stocked with all sorts of spooky specimens, thanks to Tula Pink’s De La Luna fabric. Time to make a Halloween jar quilt!

Science Jars Quilt

I use my mini rotary cutter, the Shark Applicutter, to fussy cut creepy apothecary jars filled with eyeballs, skeletons, bugs, and bats. This is a super fun project with tons of room for creativity, so let your imagination run wild as you concoct this spine-chilling quilt!

Check out a new tutorial every Monday!

Reef Shark Applique Quilt

Hop into a time machine and travel back 400 million years. You won’t find humans or even dinosaurs that far back, but you will find sharks. Why have they lasted so long? Probably because they’re totally rad.

Man Sewing Shark Applique Quilt

Sharks have up to 3,000 razor-sharp teeth at a time, and when one falls out, it can be replaced in as little as one day. Their senses – sight, smell, and hearing – are insanely powerful, and they can even detect the electric charge of other living creatures.

They never stop swimming and they never really sleep, they just cruise through life like the undisputed kings of the sea. Click HERE to learn how to make an applique shark quilt that is least as awesome as those razor-toothed beasts!

Man Sewing Shark Applique

Rob’s intricate applique quilts are certainly a masterpiece, and we’ve put together a quilt kit to help you make you’re very own! Click the button below to check out the tutorial and shop supplies.

Check out a new tutorial every Monday!

Boxed Zipper Pouch

Boxed Zipper Pouch

Picture this: You’re at the beach. All your gear is stashed in a super cool Ballistic Beach Bag – towel, sunscreen, phone, snacks – everything you need for a day of fun in the sun. But without a little organization, that big tote can turn into a black hole that eats your keys and chapstick right when you need them most. You need a zippered pouch to keep your stuff in check!

Boxed Zipper Pouch

My Boxed Zipper Pouch is well constructed with a durable lining and boxed corners. (And it’s pretty darn handsome with that shiny brass zipper and metallic print canvas.) Fill it with sewing supplies, makeup, baby gear, or school supplies. This pouch is designed to make your life easier! Click HERE to watch the tutorial.

Check out a new tutorial every Monday!

DIY Bowties with Rob and the Kids!

My kids and I love being creative together. We often spend time hiking, playing music, building with LEGO bricks, and, of course, creating in my sewing studio. Sometimes we even get a little silly! This project will delight the inner child in you and may even inspire you to do something out of the ordinary.

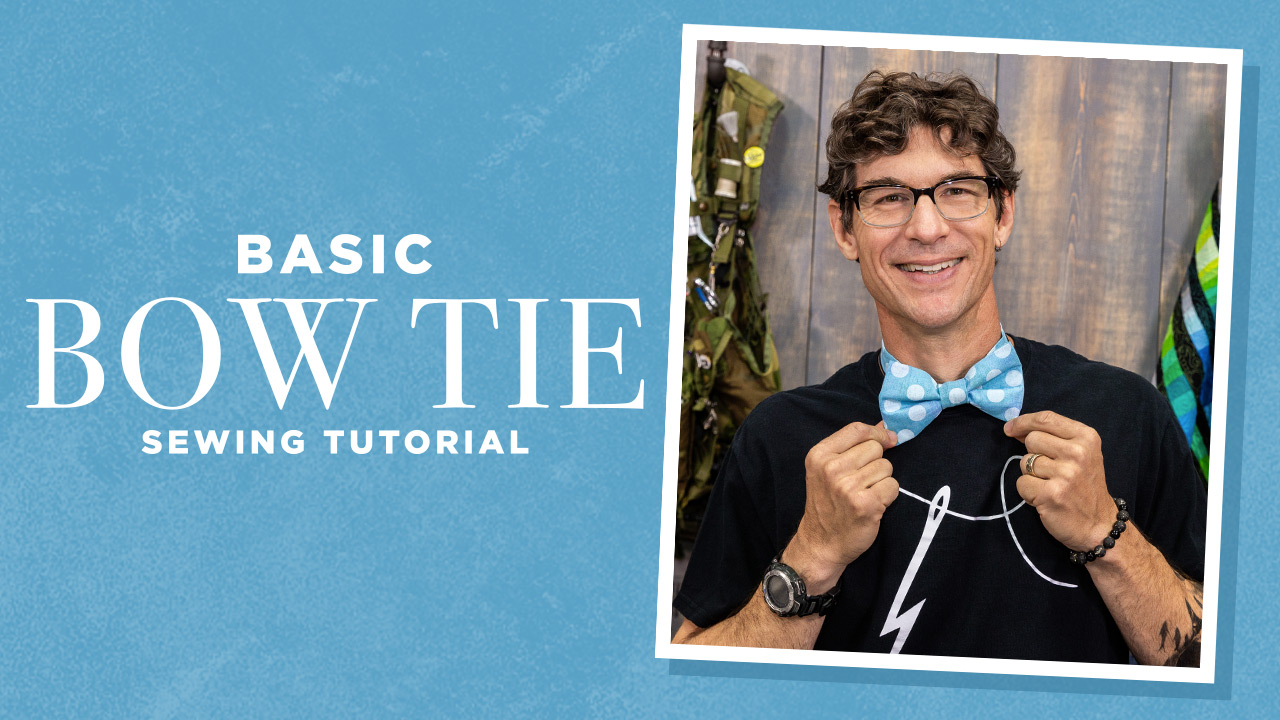
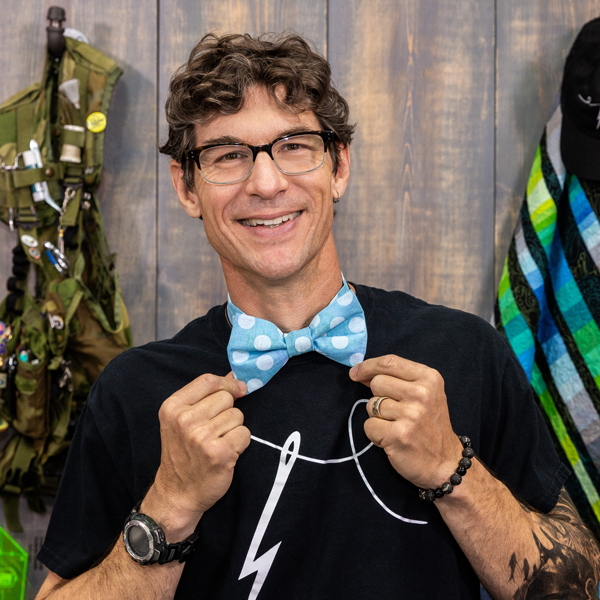
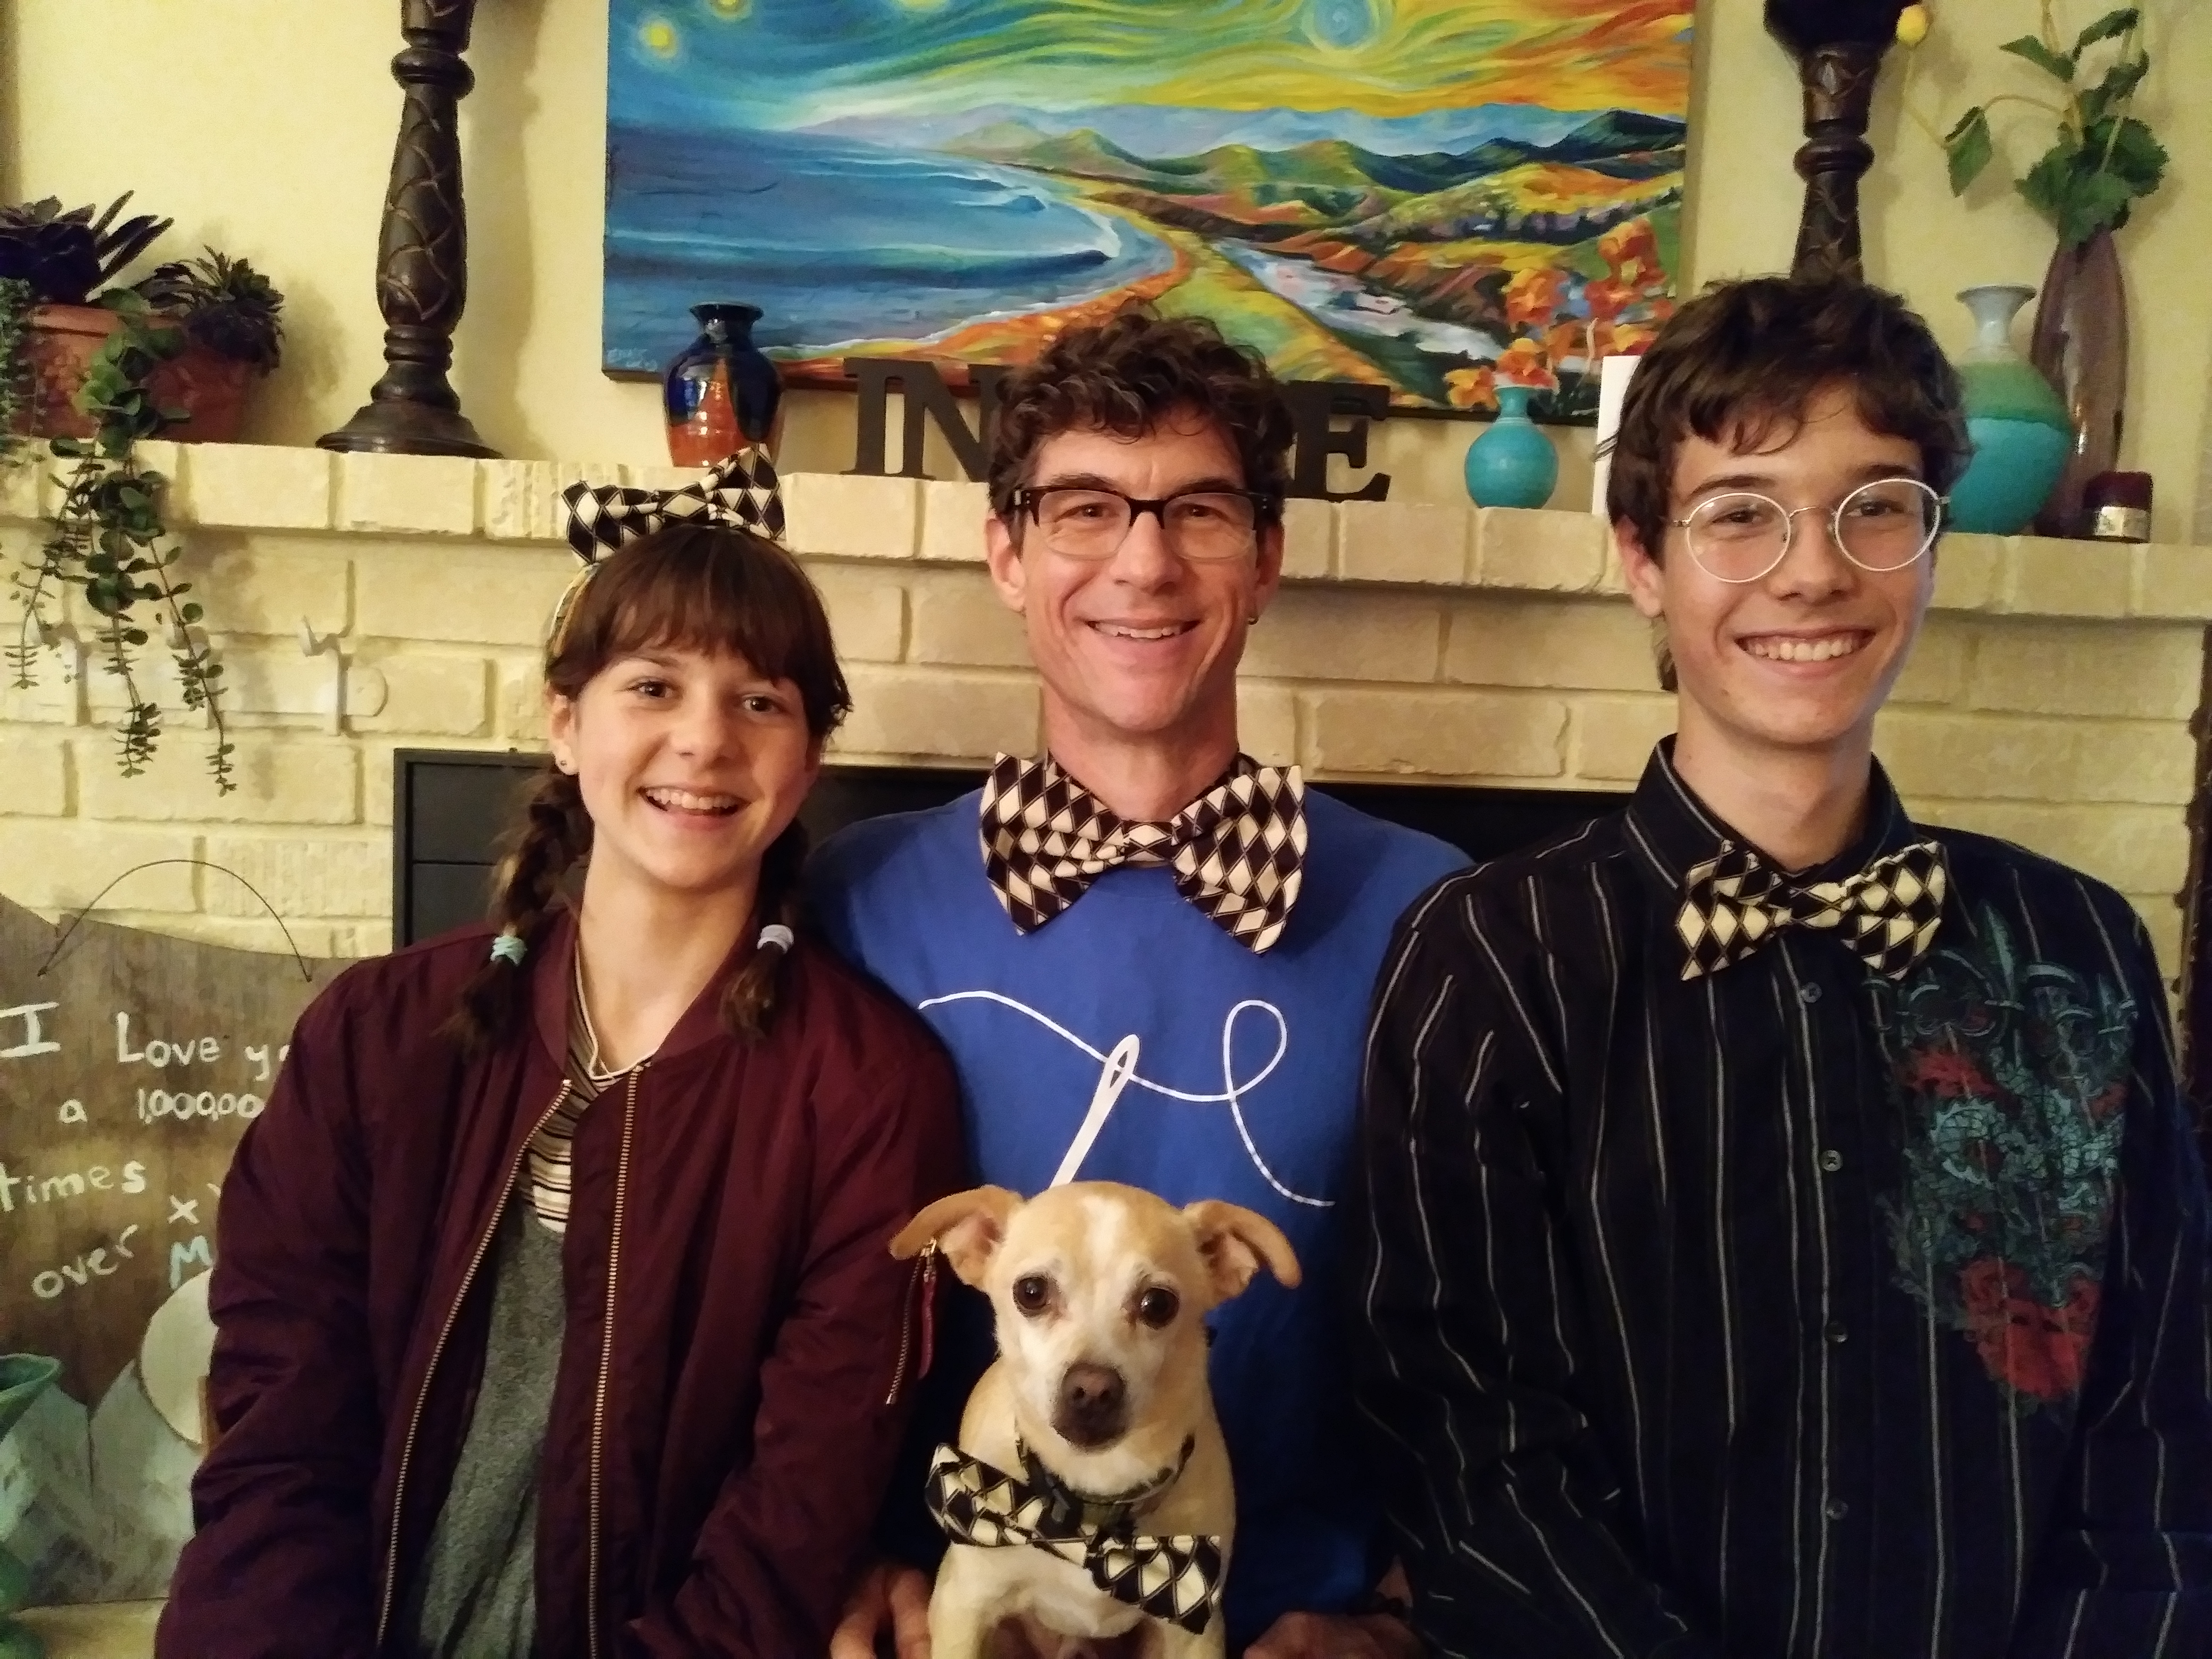
Have you ever wanted to add a dapper touch to your wardrobe? Create a fun bow tie to add that extra something. Then, go even bigger and make it clown-sized for even more excitement! Being the guy I am, I got a bit carried away and created an extra large version for myself. Then my daughter, Ruby, decided she wanted a teeny tiny version for her hair. So, we started experimenting with a simple bow tie design that works for all sizes, from small to super-sized! All you need to do is adjust the size of the bow to fit your needs.

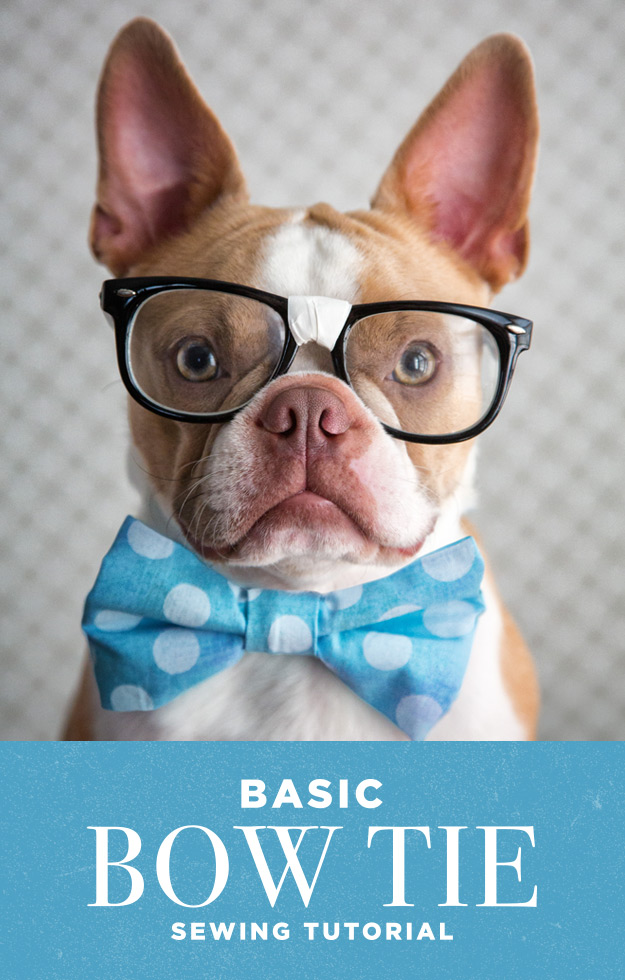
As a father, I understand the importance of spending quality time with my kids. I have also been learning that life is not about the destination, but rather about enjoying the journey. Whenever I get a chance to hang out and be creative with my family, it is a huge blessing. This project brought us together and even the dog joined in on the fun. We all laughed so hard we were crying when the dog, Winston, wanted his own bow tie too! It’s moments like these that make it all worthwhile. Be sure to subscribe to Rob’s YouTube Channel so you never miss any of his awesome tutorials! Subscribe HERE!

Check out our step-by-step instructions for making your own bow ties below!

Happy Father’s Day and Happy Creative Moments! —Rob

Bow Tie Instructions

0509182054b

Supplies Needed:

¼ yard patterned or solid quilting cotton fabric (Rob used Barber Shop by Bristol Bay Studio for Benartex) Click HERE to shop all of Missouri Star’s “masculine” prints to make a dapper bow tie or any gift, for the father in your life! 

¼ yard light to mid-weight fusible interfacing

Hook and eye closure

0510181436

Cut fabrics:

7 ½” x 12” For standard sized bow

(Rob’s XL cut was 11” x 17” and Ruby’s small hair bow was 6” x 7 ½” – secured with two bobby pins)

7 ½” x 12” Fusible interfacing (Match to the size of the first cut)

2 ½” x 6 ½” Center tie

2 ½” x Neck circumference plus 1” (For example, my neck circumference was 16”, so I cut at 17”)

HINT: If making for children, please add velcro instead of a clip to your list. You will also need to add 2 inches to the circumference of the neck rather than 1″. 🙂


Step 1.) Press the fusible interfacing to the wrong side of the bow fabric (7 ½” x 12”).
0510181520

Step 2.) Sew long sides, 12” with right sides together (RST).

0510181708b


0510181522

3.)Turn right sides out (RSO) and press the seam to the center of the bow piece.

0510181523

Step 4.) Fold right sides together with the center seam fold on outside and sew the short ends together. Trim off a bit of the end to clean up the raw edges.
0510181536

Step 5.) Then, turn the bow piece right side out so the short seams and the center seam are on the inside of the bow. Now you’re ready to make the center of the tie.

0510181536a

Step 6.) To make the center of the tie, fold the 2 ½” x 6 ½” rectangle piece right sides together(This piece does not need interfacing), and sew along the 6 ½” side. Press the seam open and to the middle BEFORE you turn right sides out. Then sew one end of the tube closed, this makes turning the tube right sides out much easier!

0510181543b

Step 7.) Turn the tube to right side out (RSO). For a fast, easy way to turn tubes, check out this Man Sewing Quick Tip HERE.

0510181544


Step 8.) Fold in the open end, keeping the raw edge tucked in, and prepare a hand needle with about 8” of thread.
0510181547

Step 9.) With the open short end against the back seam of the bow, pinch the rectangle to shape the bow, and wrap with the center strip. It should wrap around twice and stop to the backside of your bowtie. Then, catch the closed short end with the hand needle and stitch the edge underneath to the top short edge to secure.

(Pinch)

0510181550

(Start wrapping)

0510181551

(Continue wrapping)

0510181551a

(Hand stitch together on back side of bow)

0510181552

Step 10.) Sew the center strip short end to the strip to secure, then find the other corner of the first short end and catch it like you did previously. This will keep the center of the tie looking tidy.

0510181554

Step 11.) Cut the neck strap by measuring the circumference of your neck and adding 1” for the seams.

0510181555

Step 12.) Prepare the strap as you did for the center of the tie. Sew the long sides right sides together (RST), press the seam open and flat to the center, and sew one short end closed. Turn right sides out again. 
0510181559

0510181714a

Step 13.) To finish the strap, fold the closed edge of the tube into the open short end, tucking the raw edges inside, making sure you adjust this for your neck measurement.

Step 14.) Sew a hook to the underside (long seam side) of the strap on one short end, and the eye to the top side (finished) of the other end of the strap. Hint: the placement of the hook and eye will be the final adjustment for fit.

0510181611

Step 15.) Push the neck strap under the center of the tie and slide through to finish the bow tie. 

0510181614

0510181614a

There you have it! We’re a dapper bunch, wouldn’t you say?
0510181726h